Quickstart with QALIPSIS Cloud
This quickstart walks you through publishing your first scenarios to QALIPSIS Cloud, from an empty project to scenarios ready to run in your organization.
You will:
-
Create an API token in QALIPSIS Cloud.
-
Download and configure the bootstrap project.
-
Develop and document your scenarios.
-
Publish them with a single Gradle task.
-
Manage the published scenarios from your project.
Prerequisites
-
A QALIPSIS Cloud account. Open https://qalipsis.io/pricing to create a free account or subscribe.
-
Sign in at app.qalipsis.io.
-
Java 11 or later installed locally.
-
An IDE such as IntelliJ IDEA or Visual Studio Code with extensions for Java, Kotlin and Gradle (recommended).
Create an API key
Publishing to the Cloud requires an API token that authenticates your Gradle build.
-
Sign in to https://app.qalipsis.io/tokens.
-
Select your organization in the bottom left corner of the screen.
-
Click Generate new key and grant the permissions
read:scenarioandwrite:scenario. -
Copy the key immediately.
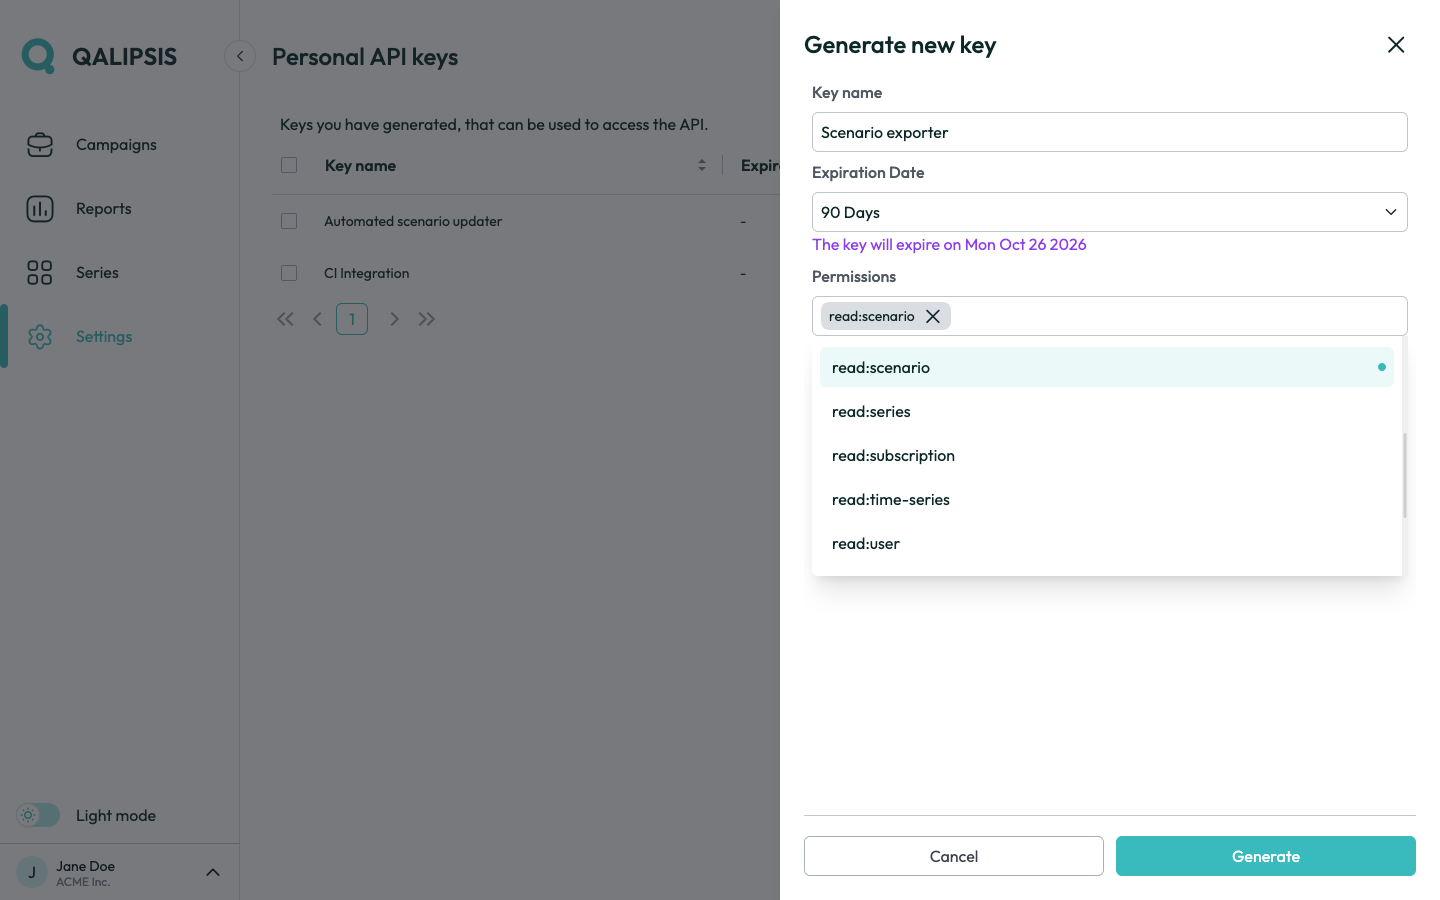
|
The token is shown only once at creation. Store it safely, as documented in the Authentication section of the REST API reference. If you lose it, revoke it and create a new one. |
Download and configure the bootstrap
The bootstrap project ships preconfigured with the QALIPSIS Gradle plugins.
-
Download and initialize the project as described in the bootstrap section.
-
Apply the cloud plugin and set its properties, typically in
gradle.propertiesat the root of your project or in your Gradle user home (~/.gradle/gradle.propertieson Linux and macOS,%USERPROFILE%\.gradle\gradle.propertieson Windows):qalipsis.cloud.registry.token=<your-api-token>Paste the token created above into
qalipsis.cloud.registry.token.
|
Keep the token out of version control. Prefer a local |
Develop your scenarios
Develop your scenarios as described in the develop scenarios section.
Give each scenario a clear identity through the @Scenario annotation. Its name, description and version are what QALIPSIS Cloud displays in your organization, so document them accurately:
@Scenario(
    name = "my-new-scenario",
    description = "POSTs to httpbin.org and verifies the response",
    version = "1.0"
)
Publish your scenarios
Run the publication task from your project directory:
./gradlew qalipsisPublishThe task packages the scenarios found on the classpath and uploads them to your organization in QALIPSIS Cloud.
A couple of seconds later, the scenarios are available in the Cloud. To confirm, start the new-campaign wizard and check that they appear in the scenario selection, with the name, description and version defined in their @Scenario annotation.
Manage published scenarios
When the property qalipsis.cloud.registry.list is set to true (the default), each build lists the scenarios currently present in your organization and generates a dedicated deletion task per scenario, named qalipsisCloudDeleteScenario<ScenarioName> (the scenario name in camel case).
To remove a scenario that is no longer relevant:
./gradlew qalipsisCloudDeleteScenarioMyNewScenarioRun ./gradlew tasks to discover the exact task names generated for your scenarios.
Next steps
-
Run a campaign against your scenarios from the Campaigns screen.
-
Define series and assemble reports to visualize the results.
-
Trigger campaigns programmatically through the REST API or the cloud campaign task.